Looking for a convenient and cost-effective solution to transport your kayak? Look no further than the DIY Kayak Cart Milk Crate!
This ingenious creation combines the versatility of a milk crate with the functionality of a kayak cart, making it the perfect accessory for any paddling enthusiast.
By repurposing a milk crate, you can easily create a sturdy and reliable cart to transport your kayak from your vehicle to the water’s edge. This DIY project requires just a few materials and tools that you likely already have on hand. With a little bit of effort and creativity, you can customize the cart to perfectly fit your kayak, ensuring a secure and hassle-free transport every time.
Not only does this DIY Kayak Cart Milk Crate provide a practical solution for easy transportation, but it also allows you to save money by avoiding the purchase of expensive commercial cart options. Plus, the satisfaction of building something with your own hands adds an extra layer of enjoyment to your kayaking adventures.
In this article, we will guide you through the step-by-step process of creating your very own DIY Kayak Cart Milk Crate. So grab your tools and get ready to embark on a DIY project that will make your kayaking experience even more enjoyable.
Table of Contents
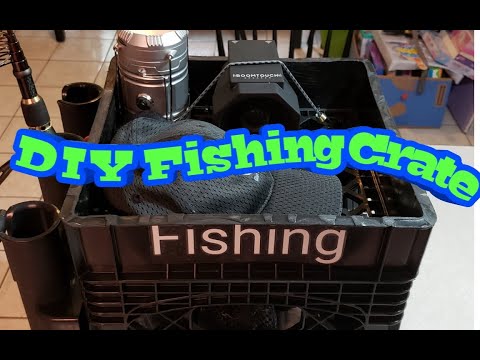
Related Video: "Easy & Affordable Kayak Fishing Crate Build | DIY How To Make | Under $50" by Fishing_With_BIG-D
Key Takeaways
- DIY kayak cart milk crate is a convenient and cost-effective solution for transporting kayaks.
- The materials needed for making a DIY kayak cart milk crate include a milk crate, two wheels, plywood/board, bungee cords, and rope.
- Tools required for constructing a DIY kayak cart milk crate include a drill, screws, screwdriver, saw, and measuring tape.
– Modifying the milk crate to create a sturdy base and customizing the cart with adjustable straps and additional accessories enhances convenience and personalization.
Gather the Materials and Tools You’ll Need
Now that you’re ready to start building your DIY kayak cart milk crate, let’s gather all the materials and tools you’ll need to make your kayaking adventures a breeze!
For this project, you’ll need a few key materials:
- a milk crate
- two wheels
- a piece of plywood or a board
- two bungee cords
- a length of rope
The milk crate will serve as the base for your cart, while the wheels will provide easy transport. The plywood or board will act as a platform to support your kayak.
As for the tools required, you’ll need:
- a drill
- screws
- a screwdriver
- a saw
- a measuring tape
Once you have all these materials and tools ready, you can move on to the next section and prepare the milk crate for the cart assembly.
Prepare the Milk Crate
Begin by gathering the necessary materials to transform the humble milk crate into a versatile and practical tool. To prepare the milk crate for its new purpose, you’ll need the following items:
- Zip ties: These’ll be used to secure the milk crate to the kayak cart frame.
- Bungee cords: These’ll help keep your gear secure during transportation.
- Foam padding: This’ll provide cushioning and protection for your kayak.
- Duct tape: This versatile tool can be used to reinforce and secure any loose ends.
- Scissors or a utility knife: These’ll come in handy for cutting and trimming materials.
Making modifications to your milk crate offers several benefits for using it as a kayak cart. It provides a sturdy base to hold your kayak securely, while also allowing you to carry additional gear. The milk crate is lightweight and easy to transport, making it an ideal choice for any kayaker.
With the materials gathered, you’re ready to move on to creating the kayak cart frame.
Transitioning into the next section, let’s now move on to creating the kayak cart frame.
Create the Kayak Cart Frame
Get ready to experience the thrill of effortless kayaking with your custom-built frame. Choosing the right wheels is essential for a smooth journey on any terrain. Look for wheels that are durable, have good traction, and are suited for the type of terrain you’ll be navigating.
Larger wheels are better for rougher terrains, while smaller wheels are ideal for smoother surfaces. Adding padding to your cart is also important to protect your kayak from scratches and damage during transport. Use foam padding or pool noodles to wrap around the frame where your kayak will rest. This extra layer of protection will give you peace of mind, knowing that your kayak is safe and secure.
Now, let’s move on to customizing the cart for your kayak.
Customize the Cart for Your Kayak
Once you’ve chosen the perfect wheels and added the necessary padding, it’s time to personalize your kayak cart for a seamless and stylish transport. Customizing your cart allows you to tailor it to your specific needs and preferences. There are various options to consider, such as adding additional storage solutions or attaching accessories for convenience. To give you an idea, here is a table showcasing three popular customizing options:
| Customizing Option | Description | Benefits |
|---|---|---|
| Adjustable Straps | Securely holds your kayak in place | Prevents shifting during transport |
| Rod Holders | Allows you to bring fishing rods along | Perfect for a fishing trip |
| Bungee Cords | Provides extra attachment points | Secures additional gear or equipment |
Don’t limit yourself to these options; feel free to get creative and explore alternative storage solutions or add-ons that suit your needs. With your customized kayak cart, you’ll be ready for any adventure. Now, let’s move on to test and use your DIY kayak cart effortlessly.
Test and Use Your DIY Kayak Cart
Take a triumphant test drive on your transformed trolley to triumphantly transport your treasure-filled vessel.
Here are some tips for maintaining your kayak cart and exploring different storage options:
- Keep your cart clean: After each use, rinse off any sand or saltwater residue to prevent corrosion and damage.
- Regularly check for wear and tear: Inspect the wheels, axles, and straps for any signs of damage. Replace any worn-out parts promptly.
- Lubricate moving parts: Apply a silicone-based lubricant to the wheels and axles to keep them running smoothly.
- Consider storage options: If you have limited space, look for collapsible or foldable kayak carts that can be easily stored in your vehicle or garage.
By following these maintenance tips and exploring storage options, you can ensure the longevity of your DIY kayak cart and enjoy hassle-free transportation of your kayak.
Frequently Asked Questions
How long does it take to gather all the materials and tools needed for the DIY kayak cart?
The DIY kayak cart can handle a maximum weight of [insert weight]. To assemble it quickly and efficiently, gather all the materials and tools beforehand, follow the instructions step by step, and make sure to secure all the parts tightly.
Can any type of milk crate be used for this project?
Yes, any type of milk crate can be used for this project. However, if you don’t have a milk crate, there are alternatives you can use such as storage bins or sturdy baskets.
Is it necessary to have previous experience in DIY projects to create the kayak cart frame?
It’s not necessary to have previous DIY experience to create the kayak cart frame, but safety precautions are important. DIY projects can be beneficial for beginners, providing a practical and detailed learning experience.
What are some common customization options for the kayak cart to fit different kayak sizes?
Customization options for the kayak cart to fit different kayak sizes include adjustable straps, extendable frames, and detachable wheels. These features make it easy to accommodate various kayak size requirements and ensure a secure and convenient transport.
Are there any weight restrictions for using the DIY kayak cart?
Weight restrictions are an important safety consideration when using a DIY kayak cart. It is recommended to not exceed the cart’s weight capacity, typically around 150 pounds, to ensure safe and efficient transportation of your kayak.

