In the vast expanse of the open water, your kayak becomes your vessel of exploration.
But what if you could take your kayak experience to new heights, or rather depths? Picture yourself effortlessly gliding through the water, propelled by a trolling motor, as you navigate through hidden coves and reach untouched fishing spots.
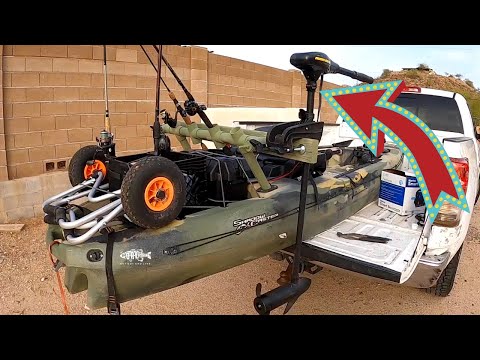
With our DIY Kayak Trolling Motor Mount, you can transform your kayak into a powerful and versatile watercraft. In this step-by-step guide, we will walk you through the process of building your own motor mount, from gathering the necessary materials and tools to attaching the motor and testing its functionality.
Whether you’re a seasoned angler looking to enhance your fishing game or an adventurous soul craving new thrills on the water, this guide is your ticket to unlocking the full potential of your kayak.
Get ready to embark on a journey of innovation and exploration as we dive into the world of DIY kayak trolling motor mounts.
Table of Contents
Related Video: "DIY Kayak Trolling Motor Mount" by G-O-A-L Fishing
Key Takeaways
- DIY Kayak Trolling Motor Mount allows you to transform your kayak into a powerful watercraft.
- Step-by-step guide to building your own motor mount.
- Gather necessary materials and tools for the project.
– Troubleshoot common mounting issues to avoid problems.
Gathering Materials and Tools
Now that you know what you need to gather, it’s time to roll up your sleeves and start rummaging through your garage for all the materials and tools you’ll need for this awesome DIY kayak trolling motor mount project!
The first step is to choose the right motor and battery for your kayak. Consider the size and weight of your kayak, as well as the desired speed and power of the motor. It’s important to select a motor that’s compatible with your kayak’s weight capacity and hull design.
Once you have the motor and battery, you’ll need to secure the mount onto your kayak. Different kayak models may require different mounting methods, so be sure to follow the manufacturer’s instructions.
Now that you have all your materials and tools ready, it’s time to move on to measuring and marking the mounting location.
Measuring and Marking the Mounting Location
First, you’ll need to bust out your trusty measuring tape and get ready to play real-life connect the dots. Determining the best location for the motor mount is crucial for a successful DIY kayak trolling motor mount. This involves finding a spot on the kayak that provides stability and balance, while also allowing easy access to the motor controls.
Choosing the right tools for measuring and marking is essential. A measuring tape with clear markings and a durable construction will ensure accurate measurements. Additionally, a pencil or marker that can make clear, visible marks on the kayak’s surface is necessary.
Once you have determined the ideal location, it’s time to move on to building the mounting bracket, where you’ll bring your measurements to life.
Building the Mounting Bracket
To successfully build the mounting bracket, you’ll need to gather the necessary materials and follow a precise set of instructions.
Customizing the mounting bracket is an important step to ensure a secure and stable connection. Consider the specific dimensions of your kayak and the motor you’ll be using to determine the appropriate size and shape for your bracket.
Troubleshooting common mounting issues is crucial to avoid any potential problems in the future. Make sure the bracket is securely attached to the kayak and can withstand the weight and vibrations of the motor. Check for any signs of looseness or instability and make necessary adjustments.
Once you have built a sturdy and customized mounting bracket, you can move on to attaching the motor to the bracket in the next section.
Attaching the Motor to the Mounting Bracket
Once you’ve got your sturdy and customized mounting bracket ready, it’s time to easily attach the motor to it for a seamless and enjoyable kayaking experience.
Begin by placing the motor onto the bracket, ensuring that the motor’s shaft aligns with the hole in the bracket. Use the provided bolts and screws to secure the motor in place, making sure they’re tightened properly for stability.
Double-check that the motor is securely attached and won’t shift during use. Take a moment to inspect the mount and ensure that there aren’t any loose parts or potential hazards.
With the motor now securely installed, you can move on to the next step of testing and adjusting the motor mount to optimize its performance.
Testing and Adjusting the Motor Mount
Now that the motor’s securely attached to the mounting bracket, it’s time to put it to the test and fine-tune its performance for an incredible kayaking adventure.
Follow these steps to troubleshoot motor issues and enhance its performance:
- Power Test: Connect the motor to a power source and turn it on. Listen for any unusual noises and check if the propeller spins smoothly.
- Speed Adjustment: Adjust the speed settings on the motor to find the optimal balance between speed and battery consumption. Test different speeds and observe the kayak’s movement.
- Steering Calibration: Test the motor’s steering capabilities by turning it left and right. Ensure that it responds accurately and smoothly. Adjust the steering tension if necessary.
- Battery Life Monitoring: Keep track of the motor’s power consumption and battery life. Note any fluctuations or sudden drops in power, which may indicate a problem with the motor or battery.
By thoroughly testing and adjusting the motor mount, you can troubleshoot any issues and optimize its performance for an enjoyable and efficient kayaking experience.
Frequently Asked Questions
How long does it typically take to complete this DIY project?
On average, completing this DIY project takes about 3-5 hours. To choose the right materials for your kayak trolling motor mount, consider factors like durability and weight. When troubleshooting common issues, check the wiring connections and motor battery.
Can this mounting bracket be used for any type of kayak?
The mounting bracket discussed in this guide is compatible with most types of kayaks. It offers several advantages, such as increased speed and maneuverability, making it a valuable addition to any kayak setup.
Are there any specific safety precautions or guidelines to keep in mind when using a trolling motor with this DIY mount?
To ensure a smooth voyage on your DIY kayak trolling motor mount, follow these safety precautions and guidelines. Check motor compatibility, make necessary modifications, and use appropriate accessories. Maintain functionality by regularly inspecting the mounting bracket and kayak.
Can I use a different type of motor with this mount, or is it only compatible with specific motor models?
You can use different types of motors with this DIY mount as long as they are compatible. However, it is important to follow safety guidelines when using any trolling motor with the mount to ensure a safe and efficient kayaking experience.
Are there any additional modifications or accessories that can be added to enhance the functionality of the trolling motor mount?
Maximize the potential of your trolling motor mount with modifications and accessories. Enhance stability with a stabilizer kit, improve control with a foot pedal, or increase convenience with a wireless remote. Unleash the full functionality of your setup.

