Looking for a convenient way to transport your kayak to and from the water? Why not build your own DIY kayak cart?
In this detailed and informative guide, we will show you step by step how to create a sturdy and reliable cart that will make your kayaking adventures a breeze.
Gathering the necessary materials and tools is the first crucial step. From there, you will measure and cut the frame to the perfect dimensions for your kayak. Once the frame is complete, it’s time to attach the wheels and axle, ensuring they are secure and able to handle the weight of your kayak.
To provide additional support and stability, we will guide you through the process of adding supports and straps to your cart. This will ensure that your kayak remains securely in place during transportation.
Finally, we will discuss how to test and use your kayak cart, ensuring that it rolls smoothly and effortlessly across various terrains. With our experienced guidance, you’ll be ready to embark on your next kayaking adventure with ease.
So, grab your tools and let’s get started on building your very own DIY kayak cart!
Table of Contents
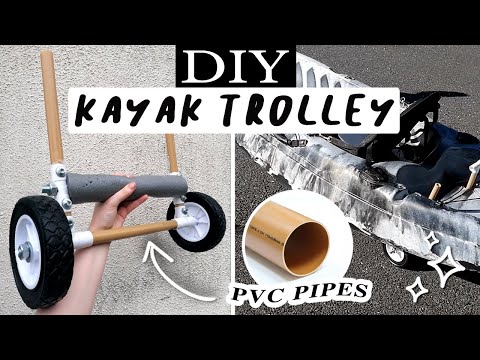
Related Video: "DIY PVC Scupper Kayak Trolley (Cheap, Easy, Strong) | Build your own Sit On Top Kayak Cart under £30" by Tasmin Bassett Art
Key Takeaways
- Choose the appropriate cart type (scupper cart or strap cart) for securely holding the kayak.
- Regularly check the wheels for wear and tear and consider using pneumatic wheels for stability on uneven terrain.
- Distribute the weight evenly to prevent strain on the wheels and axle, ensuring durability and functionality of the cart.
– Practice loading and unloading the kayak onto the cart for hassle-free transportation to the water.
Gather Materials and Tools
Let’s start by gathering all the materials and tools you’ll need for your DIY kayak cart! Choosing the right materials for your DIY kayak cart is crucial to ensure its durability and functionality. You’ll need a sturdy frame that can support the weight of your kayak, so opt for strong materials like PVC pipes or aluminum tubing. Additionally, gather a saw, measuring tape, drill, screws, and a wrench to assemble the frame accurately.
Make sure to measure and cut the frame according to the dimensions of your kayak to ensure a perfect fit. Once you have all the materials and tools ready, you can move on to the next step of measuring and cutting the frame, which will provide a solid foundation for your kayak cart.
Measure and Cut the Frame
To start, you’ll want to measure and cut the frame for your kayak cart, ensuring it fits your specific needs and preferences. Don’t worry about it being too difficult; with a little patience and the right tools, you’ll be able to create a sturdy and reliable cart in no time.
When measuring, make sure to take into account the width and length of your kayak, as well as any additional space you may want for storage or accessories. For cutting techniques, a circular saw or a handsaw with a fine-toothed blade will work best for cutting through the sturdy materials like PVC pipe or aluminum tubing. As you cut, double-check your measurements to ensure accuracy.
Frame stability is crucial, so make sure all your cuts are clean and precise, and use connectors or adhesives to secure the pieces together tightly.
Now that you have the frame ready, let’s move on to attaching the wheels and axle for easy transportation.
Attach Wheels and Axle
Once you’ve measured and cut the frame to your desired specifications, it’s time to attach the wheels and axle for effortless transportation. Here’s how you can do it:
- First, gather the necessary materials: a set of wheels and an axle that matches the width of your frame.
- Next, position the wheels on either side of the frame and mark the spots where you’ll attach them.
- Use a drill to create holes at these marked spots, making sure they’re wide enough to fit the axle.
- Insert the axle through the holes and secure it in place with nuts and bolts.
- Once the wheels and axle are securely attached, test the cart by rolling it around to make sure it moves smoothly.
- When it comes to wheel maintenance, make sure to regularly check for any signs of wear and tear, such as cracks or loose fittings. Consider using pneumatic wheels for better shock absorption and stability on uneven terrain.
Now that the wheels and axle are securely attached, let’s move on to the next step: adding support and straps to ensure your kayak is held firmly in place during transportation.
Add Support and Straps
With sturdy support and reliable straps, your kayak will be cradled like a precious gem, ensuring a worry-free journey to the water.
When it comes to choosing the right kayak cart, there are several different types available. The most common ones include the scupper cart, which fits into the scupper holes of your kayak, and the strap cart, which uses straps to secure your kayak in place. Whichever type you choose, make sure it has a strong frame and wide wheels for stability.
To properly strap your kayak onto the cart, start by placing it on the cart’s cradles or straps. Then, secure the kayak using the straps provided, making sure they’re tight and secure.
Once your kayak is securely strapped in, you’re ready to test and use your kayak cart, ensuring a smooth and easy transport to the water.
Test and Use Your Kayak Cart
Now it’s time to put your kayak cart to the test and see just how easy it is to transport your beloved kayak to the water. Testing your kayak cart is essential to ensure its durability and functionality. To properly test your cart, follow these techniques:
- Optimal Weight Distribution: Make sure to distribute the weight of your kayak evenly on the cart. This will prevent any strain on the cart’s wheels and axle.
- Maneuverability Test: Push and pull the cart with your kayak on different terrains such as grass, sand, or gravel. Test its ability to navigate through obstacles and make sure it rolls smoothly.
- Stability Test: Check if the cart remains stable when the kayak is mounted. Ensure that it doesn’t tip or wobble during transportation.
- Transport Simulation: Mimic the process of loading and unloading your kayak onto the cart. Practice securing the kayak with straps and ensure they are tight and secure.
By testing and using your kayak cart, you can be confident in its reliability and enjoy hassle-free transportation of your kayak to the water.
Frequently Asked Questions
How long does it typically take to build a DIY kayak cart?
To build a DIY kayak cart, it typically takes a few hours, depending on your experience and the complexity of the design. When choosing materials, opt for lightweight and durable options. To improve efficiency, consider adding larger wheels and a sturdy frame.
Can I use any type of wheels for my kayak cart?
Yes, you can use different types of wheels for your kayak cart. Some options include inflatable, solid rubber, and pneumatic tires. Inflatable tires provide great shock absorption, solid rubber tires are durable, and pneumatic tires offer a balance between the two. When choosing wheels, consider factors like terrain, load capacity, and ease of maneuverability.
What is the maximum weight capacity that a DIY kayak cart can handle?
The maximum weight capacity of DIY kayak carts depends on several factors, including the type of wheels used. When choosing wheels, consider factors such as their load-bearing capacity, material, and size to ensure they can handle the weight of your kayak.
Do I need any special skills or experience to build a DIY kayak cart?
Building a DIY kayak cart doesn’t require any special skills or experience. With a little determination, you can easily construct one yourself. No need to worry, just follow our guide and get ready for your kayaking adventures!
Can I modify a pre-made cart to fit my kayak instead of building one from scratch?
Yes, you can modify a pre-made cart to fit your kayak instead of building one from scratch. This allows you to customize it to your specific needs and ensures a perfect fit for your kayak.
