Are you tired of struggling to transport your kayak to the water? Do you dream of a convenient and efficient way to haul your kayak without breaking the bank? Look no further! In this step-by-step guide, we will show you how to build your own DIY kayak trailer rack.
Imagine the freedom and ease of having a reliable and sturdy trailer rack specifically designed for your kayak. With just a few materials and tools, you can create a custom rack that will securely hold your kayak and make transporting it a breeze.
This guide will walk you through each stage of the process, from gathering the necessary materials to securely attaching your kayak to the trailer rack. We will provide detailed instructions, measurements, and tips to ensure your DIY project is a success.
Don’t waste any more time struggling with cumbersome and expensive kayak transportation methods. Follow our step-by-step guide and soon you’ll be hitting the water with ease and confidence.
Let’s get started on building your very own DIY kayak trailer rack!
Table of Contents
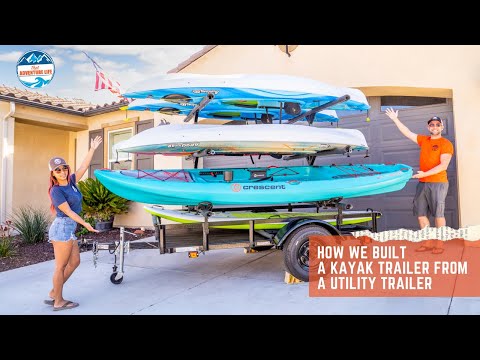
Related Video: "D.I.Y: How We Built a Kayak Trailer From a Standard Utility Trailer" by That Adventure Life
Key Takeaways
- DIY kayak trailer rack provides a convenient and efficient way to haul kayaks.
- Custom rack design ensures secure transportation of the kayaks.
- Step-by-step instructions, measurements, and tips help avoid struggling with expensive methods.
– Properly securing the kayaks with straps or bungee cords ensures safe transportation on the trailer rack.
Gather the Necessary Materials and Tools
Now that you’ve decided to build a DIY kayak trailer rack, it’s time to gather all the materials and tools you’ll need for the project.
Start by choosing the right kayak trailer size based on the number of kayaks you plan to transport. Consider the length and width of your kayaks to ensure a proper fit. Additionally, think about the weight capacity of the trailer to ensure it can handle the load.
When transporting multiple kayaks, it’s important to secure them properly to prevent any damage or accidents. Consider using straps or bungee cords to secure the kayaks to the trailer rack. Make sure the rack is sturdy enough to withstand the weight and movement during transportation.
Once you have all the materials and tools ready, it’s time to measure and cut the frame for the trailer rack. This will ensure a perfect fit for your kayaks and provide a secure and stable platform for transportation.
Measure and Cut the Frame for the Trailer Rack
To start, you’ll want to accurately measure and cut the frame for your new trailer rack, just like a skilled carpenter meticulously shaping a piece of fine furniture. Adjusting the frame dimensions is crucial to ensure a perfect fit for your kayak and a stable trailer. Take precise measurements of your kayak’s width and length, and add a few inches for clearance. Use a measuring tape and a square to mark the dimensions on the metal tubing. When cutting the metal, it’s essential to use the right tools. A metal cutting saw or an angle grinder with a metal cutting disc will do the job effectively. Remember to wear protective gear like safety goggles and gloves. Take your time and follow your marked lines carefully to ensure accurate cuts. Once the frame is cut, you can move on to assembling the frame and attaching the crossbars, which we’ll cover in the next section.
Assemble the Frame and Attach Crossbars
Once you’ve cut the frame to the correct dimensions, it’s time to bring it all together by assembling the frame and securely attaching the crossbars.
To ensure a sturdy and durable kayak trailer rack, it’s crucial to choose the right materials. Opt for high-quality metal or aluminum for the frame and crossbars, as they offer strength and resistance to rust and corrosion.
Begin by positioning the frame pieces according to the measurements you took earlier, making sure they’re properly aligned. Use heavy-duty bolts and nuts to fasten the frame securely.
Next, attach the crossbars across the frame, ensuring they’re evenly spaced and level. This will provide a stable base for your kayaks.
With the frame and crossbars assembled, you can now move on to the next step of installing the trailer hitch and mounting brackets.
Install the Trailer Hitch and Mounting Brackets
Begin by bolting the trailer hitch and mounting brackets onto the frame, blending the two seamlessly for a secure and sturdy setup.
When it comes to trailer hitch installation tips, make sure to follow the manufacturer’s instructions carefully. Choose a trailer hitch that’s compatible with your kayak and can support its weight.
Next, select the right mounting brackets based on the size and shape of your kayak. These brackets will securely hold your kayak in place during transportation. Attach the mounting brackets to the frame using the provided hardware, making sure they’re tightened properly.
Once the trailer hitch and mounting brackets are securely installed, you can move on to the next step of securely attaching the kayak to the trailer rack, ensuring it remains stable and safe throughout your journey.
Securely Attach the Kayak to the Trailer Rack
Attach the kayak securely to the trailer rack, ensuring it stays in place and remains stable throughout your journey. To do this, you need to use proper kayak tie down techniques.
Start by placing the kayak on the trailer rack, making sure it’s centered and balanced. Use kayak straps or ropes to secure it tightly to the rack. Make sure to wrap the straps or ropes around the kayak multiple times, creating a crisscross pattern for maximum stability.
It’s important to choose the right trailer rack for your kayak to ensure a secure fit. Look for a rack that’s specifically designed for kayaks, with adjustable features to accommodate different sizes and styles.
Remember, proper attachment is crucial to keep your kayak safe and protected during transportation.
Frequently Asked Questions
How much weight can a DIY kayak trailer rack hold?
You’re probably wondering just how much weight your DIY kayak trailer rack can handle. Well, let me tell you, it can handle a boatload! Just make sure you know how to properly secure your kayaks and distribute the weight evenly.
Can I use a different type of material for the frame instead of the one suggested in the article?
Yes, you can use a different type of material for the frame. Some alternative frame materials include aluminum, steel, and PVC. Each material has its own pros and cons, such as durability, weight, and cost.
What are some safety precautions to keep in mind while assembling the trailer rack?
To ensure your safety while assembling the trailer rack, use proper equipment and protective gear like gloves and safety goggles. Securely fasten the kayak to the rack using straps or bungee cords, ensuring it is tightly secured for transportation.
Are there any specific tools needed for installing the trailer hitch and mounting brackets?
To install the trailer hitch and mounting brackets, you’ll need a few specific tools: a socket wrench, a torque wrench, a drill, and appropriate drill bits. These tools will ensure a secure and reliable installation. Additionally, consider alternative mounting options for kayak racks, such as using roof racks or bed extenders.
Can the trailer rack be easily disassembled and stored when not in use?
You’ll be thrilled to know that disassembling and storing your trailer rack is an absolute breeze! Get ready for some creative storage solutions and handy tips for maximizing space. Say goodbye to clutter and hello to convenience!

