Are you tired of constantly tripping over your kayak and struggling to find a place to store it? Look no further! Introducing DIY Kayak Rack X: A Step-by-Step Guide, the ultimate solution to all your storage woes.
This comprehensive guide will take you through the process of building your very own kayak rack, ensuring that your prized possession is not only safely stored but also easily accessible whenever adventure calls.
With our detailed instructions and your handy tools, you’ll be able to create a sturdy and efficient storage solution that will make your neighbors green with envy. From gathering the necessary materials to adding support bars and padding, we’ve got you covered every step of the way.
Our knowledgeable and passionate approach will guarantee that you not only build a kayak rack, but also gain a sense of accomplishment and pride in your DIY skills.
So, get ready to transform your cluttered space into a kayak haven with DIY Kayak Rack X: A Step-by-Step Guide. Get your tools ready, because storage nirvana awaits!
Table of Contents
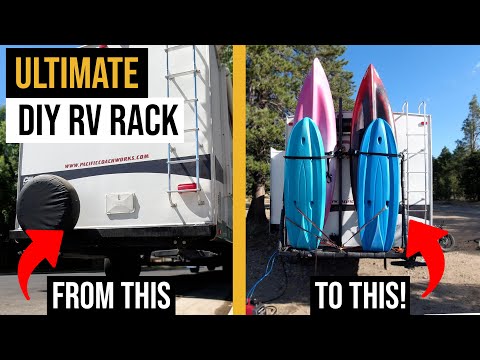
Related Video: "How to build a DIY RV REAR RACK for Kayaks, Generators and Bikes - Detailed Steps" by Ladies & Gentz
Key Takeaways
- DIY Kayak Rack X provides a solution for storing kayaks and avoiding storage issues.
- The guide offers detailed instructions and tools needed to build a strong and accessible kayak rack.
- Separating sections for each kayak and ensuring easy access are essential for organizing kayak storage space.
– The steps for building the rack include measuring and preparing the space, choosing a suitable location, building a sturdy frame, adding support bars, securing kayaks with straps, and testing the rack’s durability.
Gather the Necessary Materials and Tools
Now that you’re ready to dive into building your own kayak rack, let’s gather all the materials and tools you’ll need to bring your vision to life.
Choosing the right materials and tools is crucial for a sturdy and functional kayak rack. Start by selecting weather-resistant lumber like pressure-treated wood or cedar for the frame. You’ll also need galvanized screws, washers, and eye bolts for added strength and durability.
Don’t forget to grab a measuring tape, level, drill, and saw to help with the construction process. Additionally, consider adding hooks or straps to keep your kayaks securely in place.
Tips for organizing a kayak storage space include designating separate sections for each kayak and leaving enough room for easy access.
With all the necessities in hand, let’s move on to measuring and preparing the space for your new kayak rack.
Measure and Prepare the Space
Before you dive into creating your own space-saving storage solution, take the time to measure and prepare the area where you’ll be installing it.
Choosing the right location is crucial for the success of your DIY kayak rack. Look for a spot that’s easily accessible and provides enough space to accommodate your kayaks.
Ensure proper measurements by using a tape measure to determine the height, width, and depth of the area. This’ll help you determine the size of the rack and ensure that it fits perfectly in the designated space.
Clear any obstacles or debris from the area to create a clean and organized space for your rack.
Once you’ve measured and prepared the space, you can move on to the next step of building the frame.
Build the Frame
To build the frame, start by assembling the wooden beams and securing them together with screws and a drill. When choosing materials for the kayak rack frame, opt for sturdy and weather-resistant options like pressure-treated lumber or aluminum. These materials will ensure the longevity of your rack and protect your kayaks from damage.
To ensure stability and strength, consider adding cross braces between the beams. This will prevent any wobbling or shifting of the frame, keeping your kayaks secure. Additionally, make sure to use the appropriate screws and hardware to reinforce the joints and connections. By following these tips and utilizing the right materials, you can create a strong and stable DIY kayak rack frame that will safely support your kayaks.
Now, let’s move on to adding support bars and padding to further protect your kayaks.
Add Support Bars and Padding
To ensure that your kayaks are securely held in place on your DIY kayak rack, it’s crucial to install support bars. These bars will provide the necessary stability and prevent any unwanted movement during transportation.
Additionally, attaching padding to the rack will protect your kayaks from scratches and other potential damages, allowing you to enjoy your kayaking adventures worry-free.
By taking these steps, you can be confident that your kayaks will be well-protected and ready for your next exciting expedition.
Install support bars to hold the kayaks in place
First, attach the support bars to securely hold your kayaks in place, ensuring that they’re safely stored and ready for your next adventure.
Did you know that kayaking can burn up to 500 calories per hour, helping you stay fit while enjoying the great outdoors?
To choose the right type of support bars for your kayak rack, consider the weight and dimensions of your kayaks. Look for bars that’re sturdy and adjustable to accommodate different sizes.
When securing the kayaks to the support bars, use strong straps or bungee cords to prevent them from shifting during transport. Make sure to distribute the weight evenly and tighten the straps securely.
By following these tips, you can have peace of mind knowing that your kayaks are securely fastened to the support bars.
Now, let’s move on to the next step and attach padding to protect the kayaks from scratches.
Attach padding to protect the kayaks from scratches
Once the support bars are securely attached, it’s crucial to add padding to protect your kayaks from any potential scratches.
Proper kayak storage and protection is of utmost importance to ensure the longevity and durability of your kayaks. Not only does padding prevent scratches, but it also helps in securing the kayaks in place and reducing any potential damage during transportation.
There are various types of padding materials available for kayak racks, such as foam blocks, pool noodles, or specialized kayak pads. Foam blocks provide excellent cushioning and can be easily cut to fit the shape of your kayaks. Pool noodles are a cost-effective option that can be slid onto the support bars. Specialized kayak pads are designed specifically for this purpose and offer superior protection.
With the padding in place, you can now move on to the exciting phase of testing and finalizing your DIY kayak rack.
Test and Finalize the Rack
Now that you’ve assembled the DIY kayak rack, it’s time to put it to the test and make any necessary final adjustments.
Did you know that a study found that using a kayak rack can reduce the risk of damage to your kayak by 80%? This is why testing the durability of your rack is crucial before hitting the water.
To test it, load your kayak onto the rack and examine how it holds up. Pay attention to any signs of instability or weakness. Give it a gentle shake and see if it remains sturdy. You can also compare the performance of different materials used in the rack construction. This will help you determine which material is the most reliable and suitable for your needs.
Once you’re satisfied with the rack’s performance, make any final adjustments if necessary. Now you can confidently transport your kayaks without worrying about damage.
Frequently Asked Questions
How much weight can the DIY kayak rack hold?
The weight capacity of the DIY kayak rack is impressive, ensuring that it can securely hold your kayak without any worries. Its durability is also commendable, allowing you to transport your kayak with confidence and peace of mind.
Can this kayak rack be used for other types of watercraft, such as canoes or paddleboards?
Yes, a DIY kayak rack can easily be modified for other watercraft like canoes or paddleboards. You can use alternative materials like PVC pipes, wood, or even metal to build a sturdy rack.
Is it necessary to anchor the DIY kayak rack to the wall or floor?
Yes, it is necessary to anchor the diy kayak rack to the wall or floor for stability and safety. To build a diy kayak rack, you will need tools such as a drill, screws, and anchors.
What type of padding or cushioning should be used to protect the kayaks from scratches or damage?
Protective padding, such as foam cushioning, should be used to prevent scratches and damage to your kayaks. It provides a soft and cushioned barrier, ensuring your kayaks are protected during storage and transportation.
How long does it usually take to complete the DIY kayak rack project from start to finish?
On average, it takes about 4-6 hours to complete the DIY kayak rack project from start to finish. You will need a few necessary tools such as a drill, screws, a saw, and a measuring tape.

